How to Install a VPN on an iPhone
You are about to connect your iPhone to airport or café Wi-Fi and would rather not send your traffic through an unsecured network without protection. A VPN encrypts the connection between your iPhone and the VPN server. Learning how to install a VPN on an iPhone takes only a few minutes, and most services handle the technical setup automatically.
Choose a VPN App for Your iPhone
The easiest option is installing your VPN provider’s official iOS app through the App Store.
Before choosing a service, check its privacy policy, encryption, DNS leak protection and connection protection features. Your priorities matter too. Streaming users may care more about server locations, while frequent travelers may prioritize stable connections on public Wi-Fi.
Be cautious with unknown free VPN apps. Check how the provider handles user data and supports its service before trusting it with your internet traffic.
How to Install a VPN on an iPhone
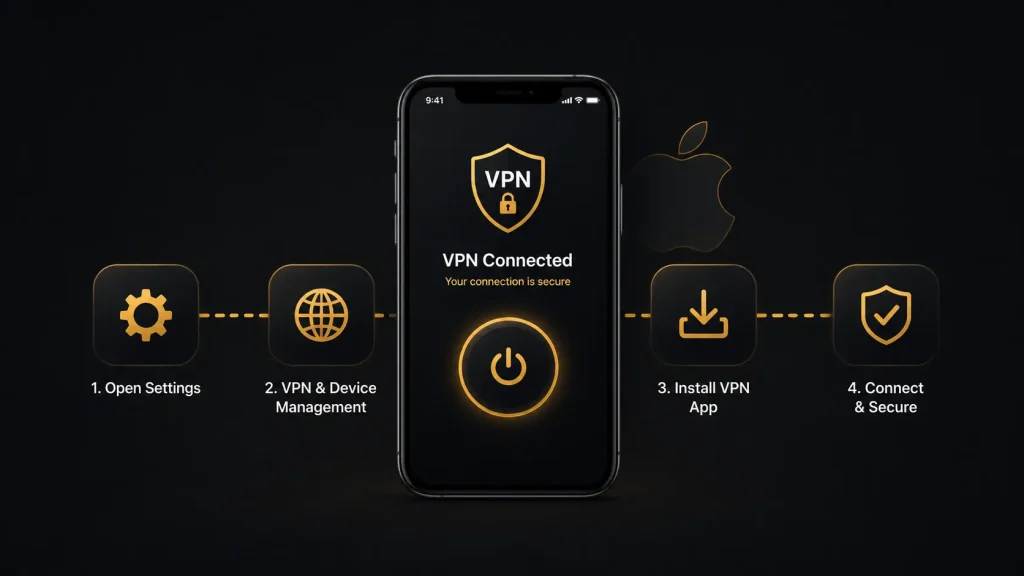
Open the App Store and search for the official app from your VPN provider. Check the developer name to avoid unofficial copies.
Download the app, open it and sign in or create an account. Choose a server location and tap the connect button.
The first time you connect, iOS will ask for permission to add a VPN configuration. Approve the request and authenticate with Face ID, Touch ID or your passcode if required.
Once connected, the VPN app should display the active connection. After this initial setup, connecting usually takes only one tap.
Can You Set Up a VPN Manually?
Yes. iOS supports manual VPN configuration. This can be useful if your workplace, school or VPN provider gives you specific connection details.
Open Settings and locate the VPN configuration options. Add a configuration using the server address, account details and other information provided by the service.
Manual setup gives you more control, but most users do not need it. An official VPN app usually manages configuration and server selection automatically.
Settings Worth Checking
After installation, open the VPN app’s settings and review its privacy and connection options.
Keep DNS leak protection enabled if available. Automatic connection can also be useful if you regularly join public Wi-Fi.
Some apps let you choose between VPN protocols such as WireGuard or OpenVPN. The default or automatic option is usually suitable unless you have a specific reason to change it.
Also check what happens if the VPN connection drops. A kill switch or similar feature can prevent traffic from continuing outside the VPN connection.
Check That Your VPN Is Working
Connect to a VPN server and open your browser. Websites should load normally.
You can compare your public IP address before and after connecting. It should change while the VPN is active.
If websites stop loading, disconnect and try another server. Restarting the app or switching between Wi-Fi and mobile data can also solve temporary connection problems.
Using a VPN on Your iPhone
Once configured, connect before joining public Wi-Fi or whenever you want your traffic routed through a VPN server.
A VPN improves connection privacy, but it does not make your iPhone completely anonymous. Account logins, cookies and other identifiers can still connect online activity to you.